A gentle introduction to git and Github
Git is a command line-based distributed version control system. Version control system means that its goal is to track and record every change in a set of text files (typically source code, but not exclusively), collectively called a repository. It then possible to check what every changes contained and when it occurred, and to recover and return to any previous state of the tracked files.
Distributed means that these tracked files can be stored on many different computer systems, such as a local computer, remote servers, or in the cloud. None plays the role of main copy, they are all equivalent, and users can synchronise (pull and push) code from one to another.
Git is without any doubt a powerful but relatively difficult piece of software to use. It was developed by Linus Torvalds, the main developer of the Linux Kernel, for the development of the Linux kernel. GitHub, is a web interface to git. It allows to perform the most important functions of git through a friendly and easy to use graphical interface, adding some handy project management and sharing features. We are going to focus on GitHub, an illustrate
- the creation of a repository
- adding and modifying files
- external contributions using forks and pull requests
- open, comment and close issues
While the main context in which my colleagues come to know git and GitHub is bioinformatics-related, I’m going to demonstrate it with something many more people are familiar with. We are going to use GitHub to manage a pancakes recipe.
Note that to use GitHub, one needs to create a free account, so that all operations can be tracked and attributed to a person. Here, I will be using two accounts here, namely my main account lgatto, and LaurentGatto.
A new repository
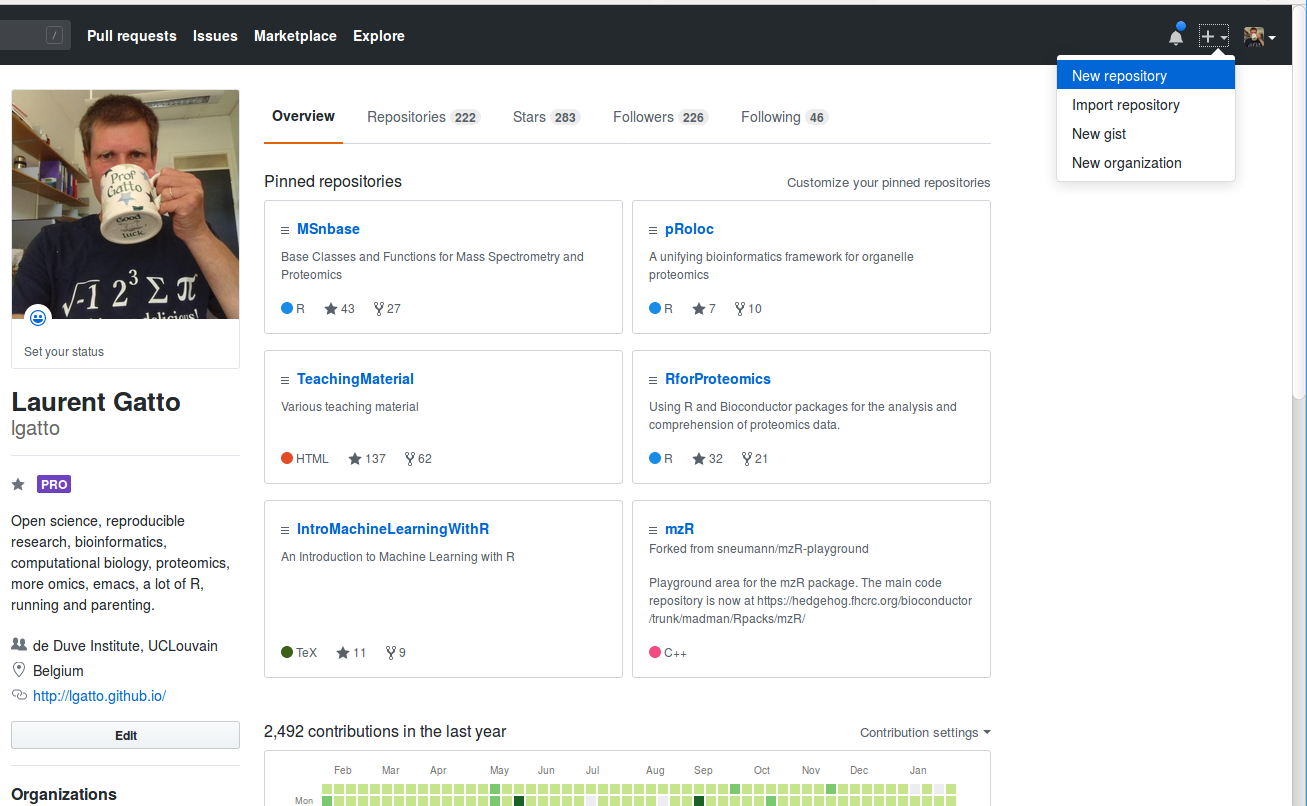
Below, I start by creating a repository under user lgatto by
clicking on the + in the top right corner, and choosing New
repository.
The next step is to name the repository (I call it pancakes),
provide a short description, choose whether to make it public or
private (we choose the former). I also choose to initialise the
repository with a README1 file (by default, it will be
README.md, in markdown format).
We won’t use any of the suggested licences here, as those are targeted towards software generally. It we wanted to set one, we would probably use CC-BY and mention it in the README file.
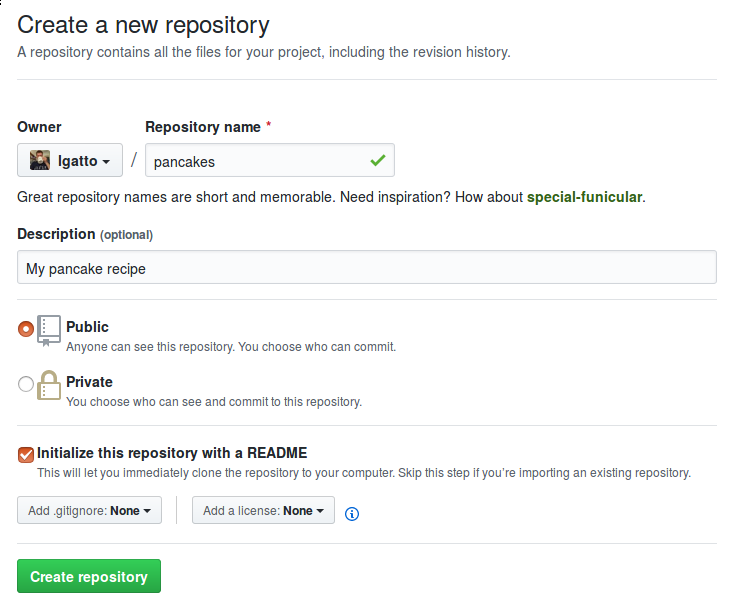
We can now click the Create repository button to actually create
it. We obtain the repository lgatto/pancakes populated with the
README.md file.
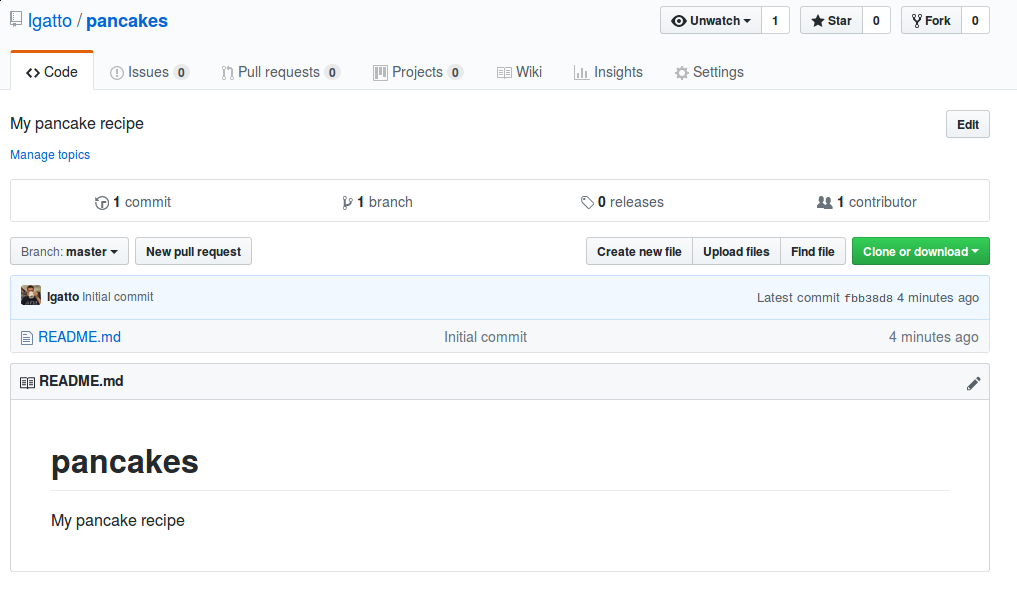
This is a remote repository, as it lives remotely (on one of the GitHub servers). Later, we’ll see how to clone it locally. Note that the remote repository isn’t special in any way, and doesn’t necessarily define the main one. In this case, it happens to be the first one that was created, but we could also have created a local repository and pushed it remotely.
Adding a file
It is simple to create or upload new files to the remote repository by
clicking the respective grey buttons (see the grey button on the
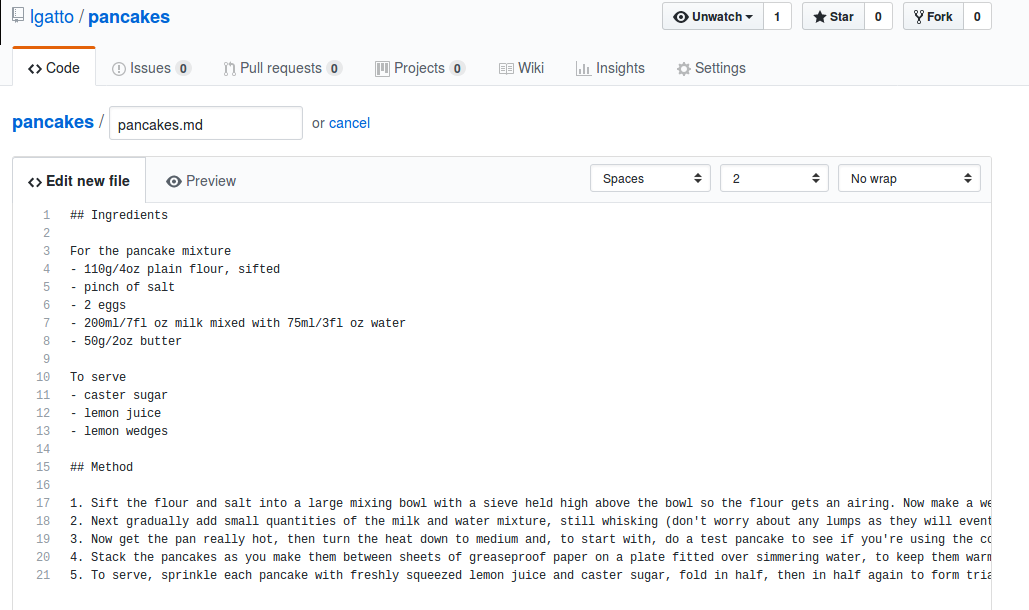
previous screen-shot). I can click Create new file to open a
interface where I can give the file a name (here we use
pancakes.md, specifying the markdown file extension), and copy/paste
and adapt the recipe from the recipe BBC
recipe
site.
At the bottom of the page, I provide a commit message, which is a message that is recorded as part of the history of the repository. Using good commit messages is important as it helps understand the changes and the evolution of a repository without the need to look at the actual individual changes.
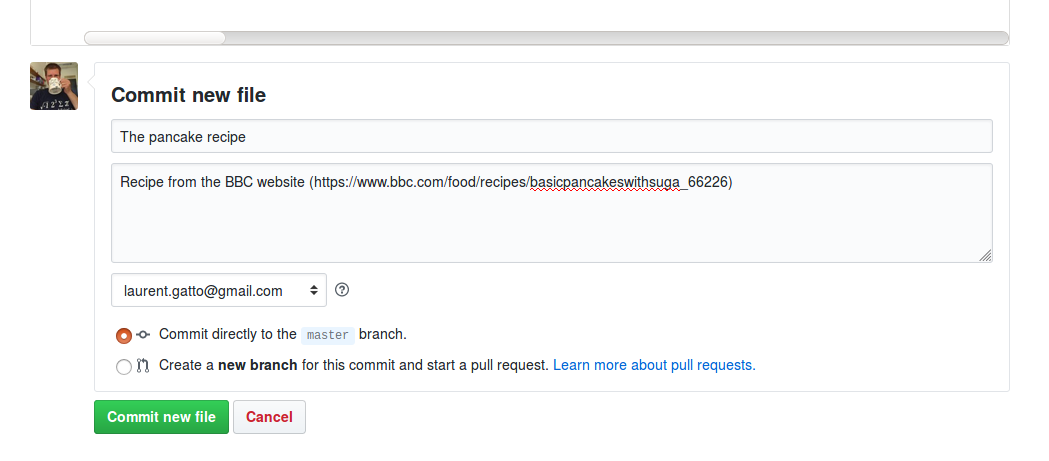
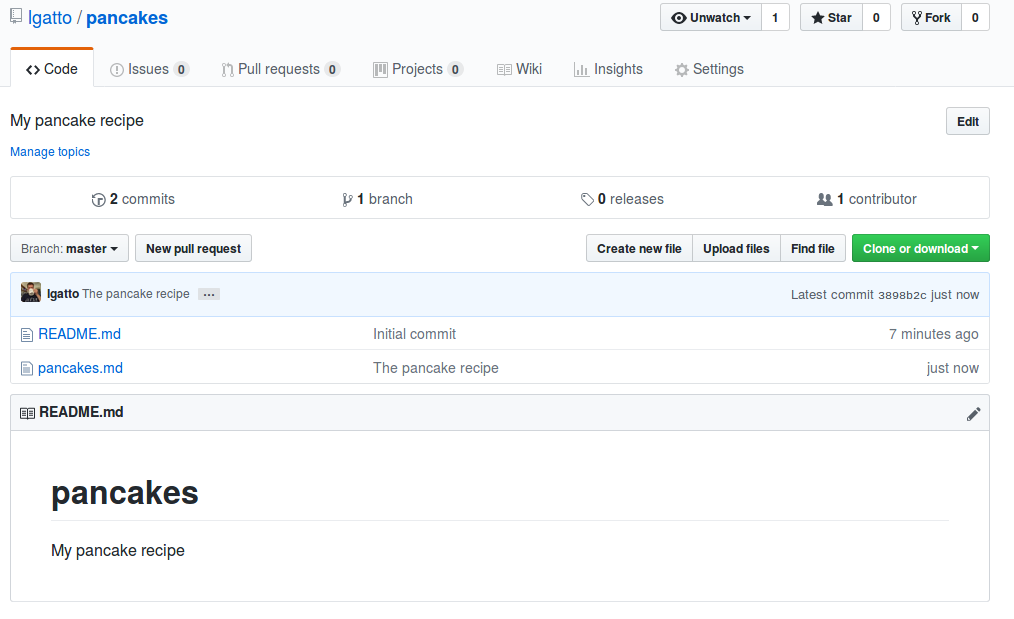
After clicking Commit new file, I see the new state of my
repository, that now contains two files, namely README.md and
pancakes.md.
I can inspect the history of that repository by clicking on the commits link under the repository name. At this stage I have two commits:
- the initial commit that created the repository with the README file, and
- the one that added the recipe itself.
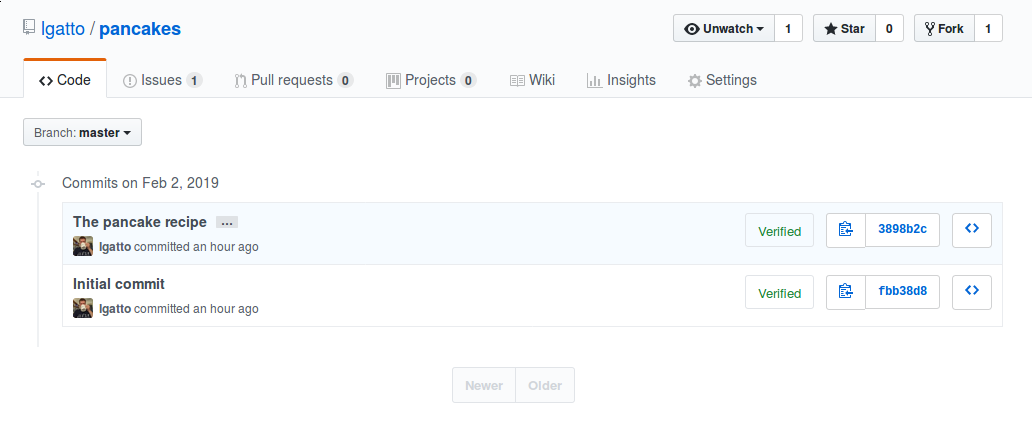
On the right, I can read the first couple of characters of the commit tags. It uniquely identifies each commit and, as a consequence, each state of the repository.
Using issues
A very attractive feature of GitHub, which is specific to the web
interface and is missing from the git software, is the availability of
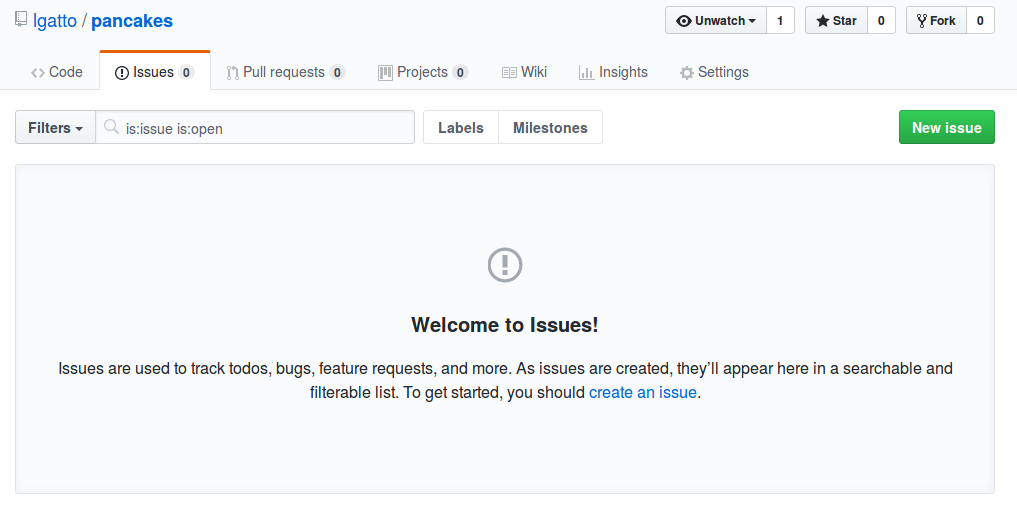
repository-specific issues. The current repository hasn’t any (open)
issue yet, as shown by the Issues (0) tab.

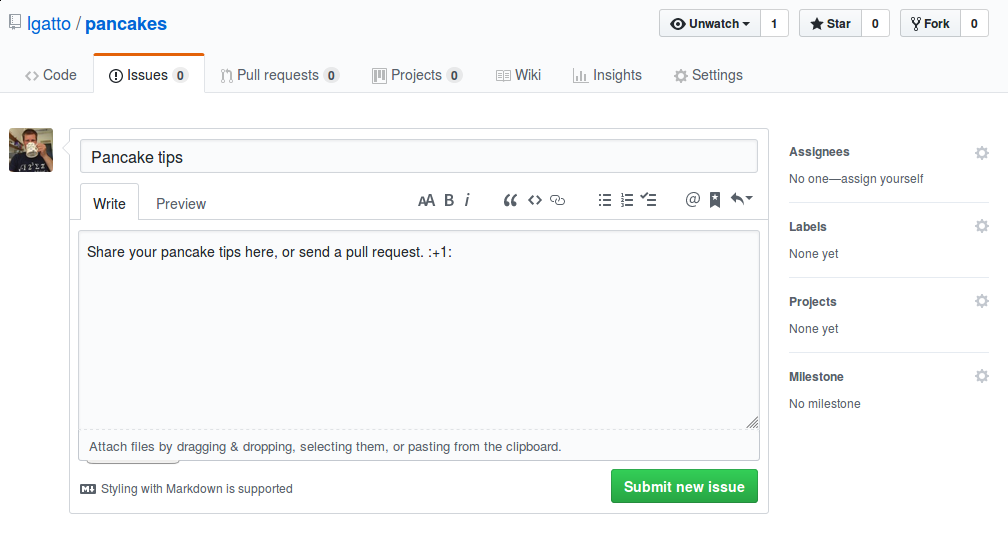
To open a new issue, I select that tab and then press the green New
issue button, that opens an issue edition window.
I can now write a new issue using the markdown format. Here, I use an emoji, and could also easily add figures and links to other issues.
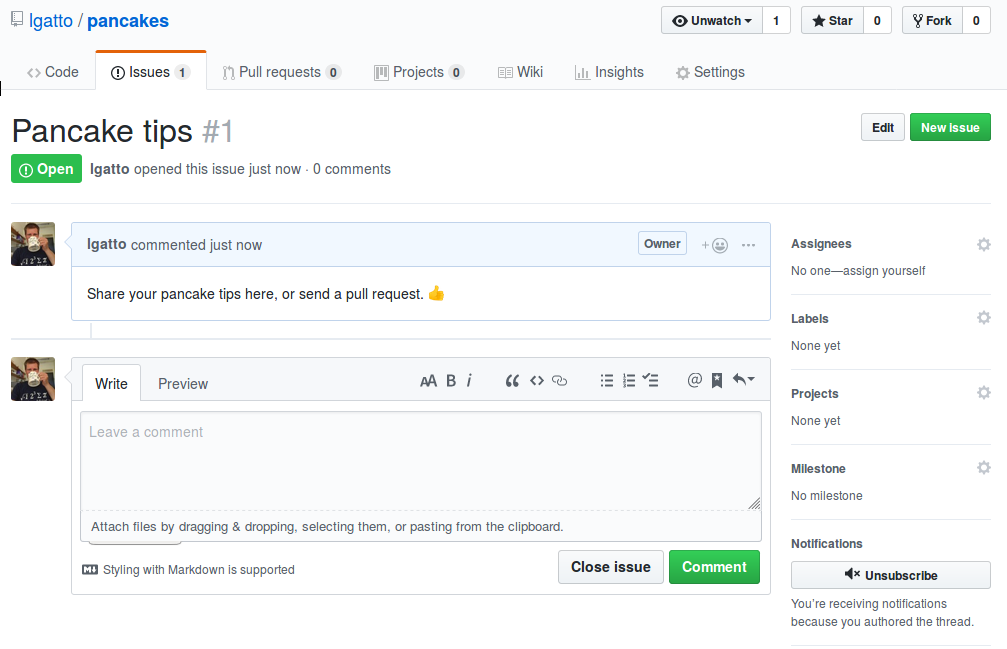
Once submitted, the issue nicely displays for anyone to see and comment.
I now switch to the LaurentGatto account and post a comment on this
issue which, as a reminder, is an issue in the pancakes repository
that belongs to user lgatto.
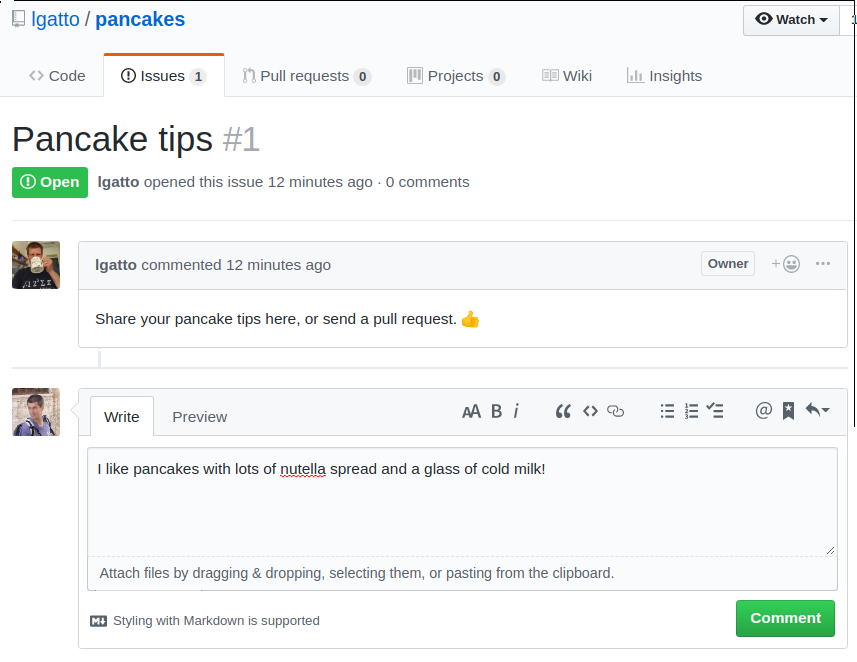
The comment is publicly visible and others could further comment and discuss.

External contributions
The following feature is probably the one where GitHub particularly shines. It is an extremely powerful mechanism to collaborate and track external contribution to a repository.
As user LaurentGatto, I can choose to fork lgatto’s pancakes
repository (or any publicly available repository for the matter) by
clicking on the Fork button in the top right corner. Forking is
going to create an exact copy of the repository, including all the
commit history (but not the issues) into the new account, while
keeping a public record of where it comes from.
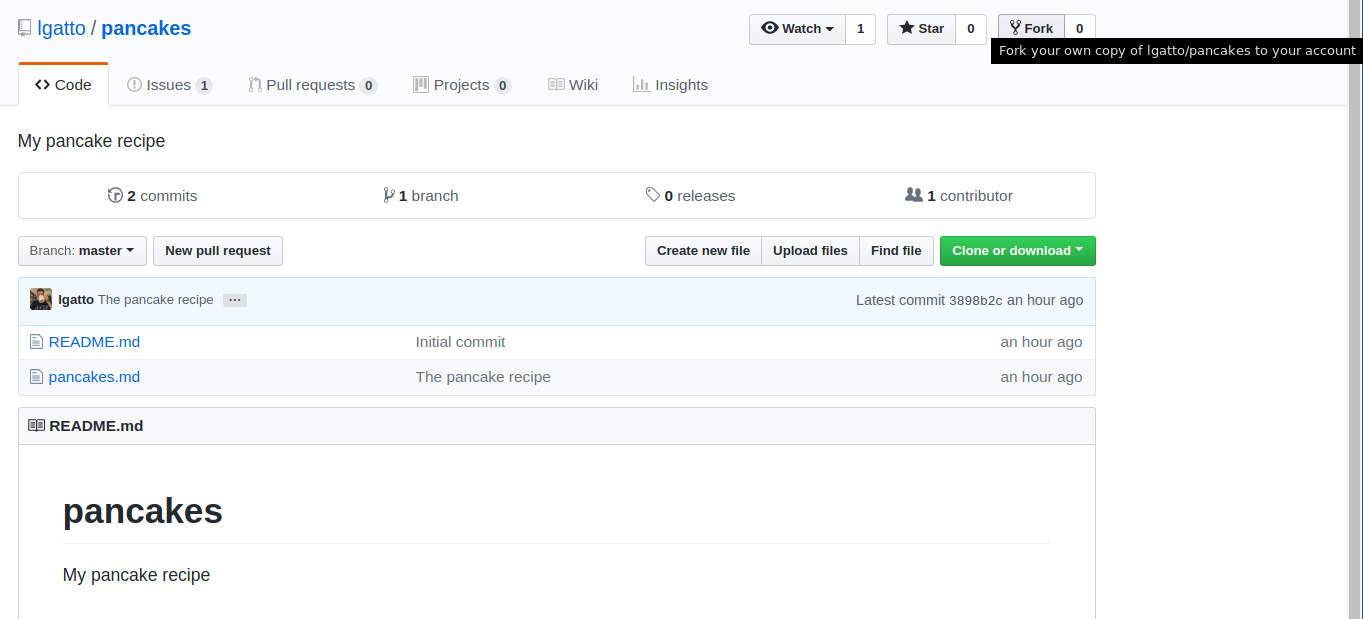
The following screen-shot shows the forking transition screen.
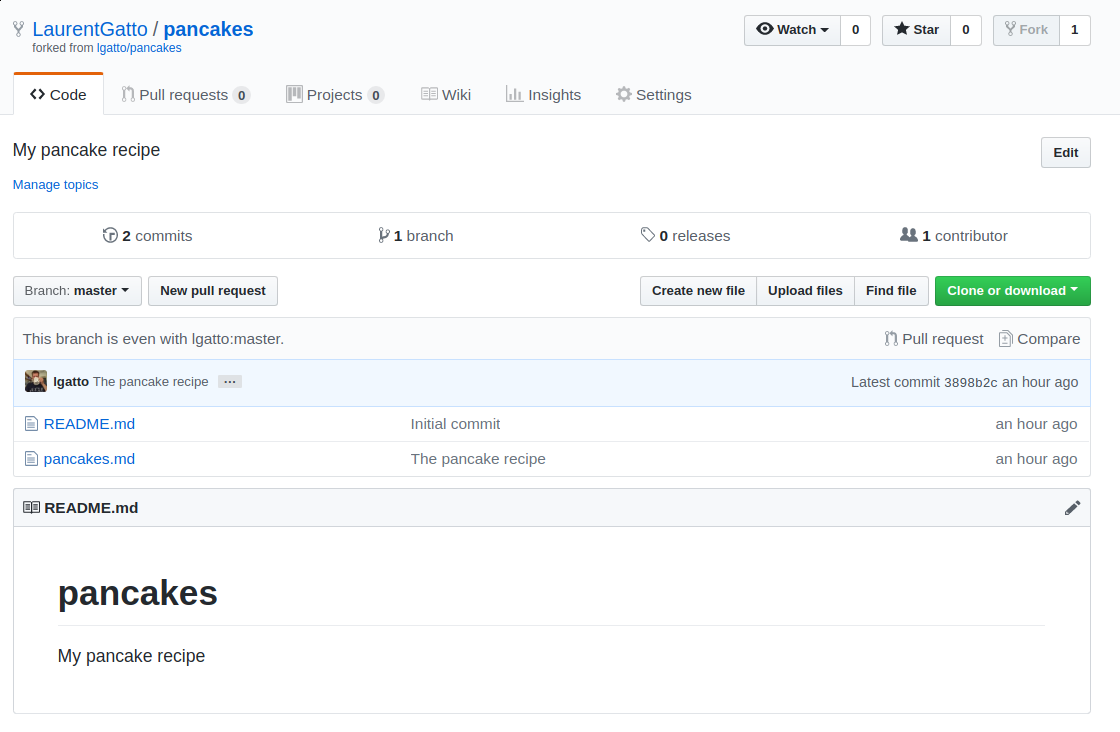
Below, we see the LaurentGatto/pancakes repository that, just under
the repository title/name, is clearly labelled as a fork of
lgatto/pancakes. The little avatar, on the left of the latest
commit line, indicates that the last commit was by lgatto - the
whole repository history is preserved.
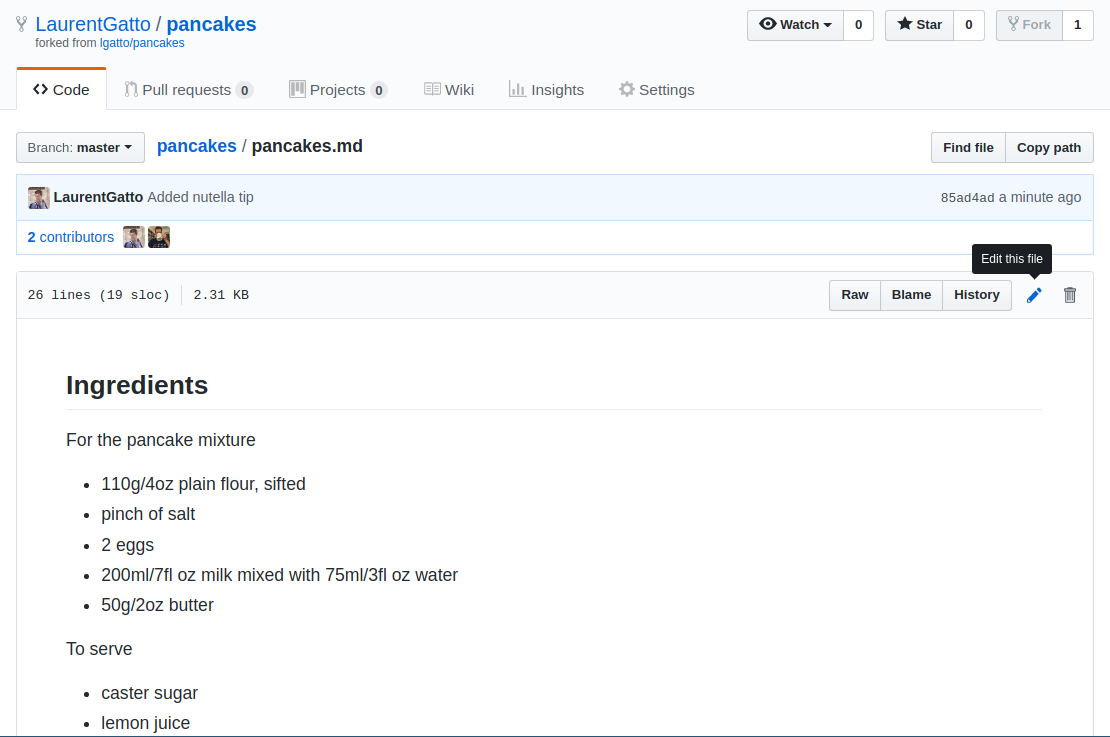
User LaurentGatto can now edit or upload new files. Below, he clicks
the little pen on the right to edit the pancakes.md files.
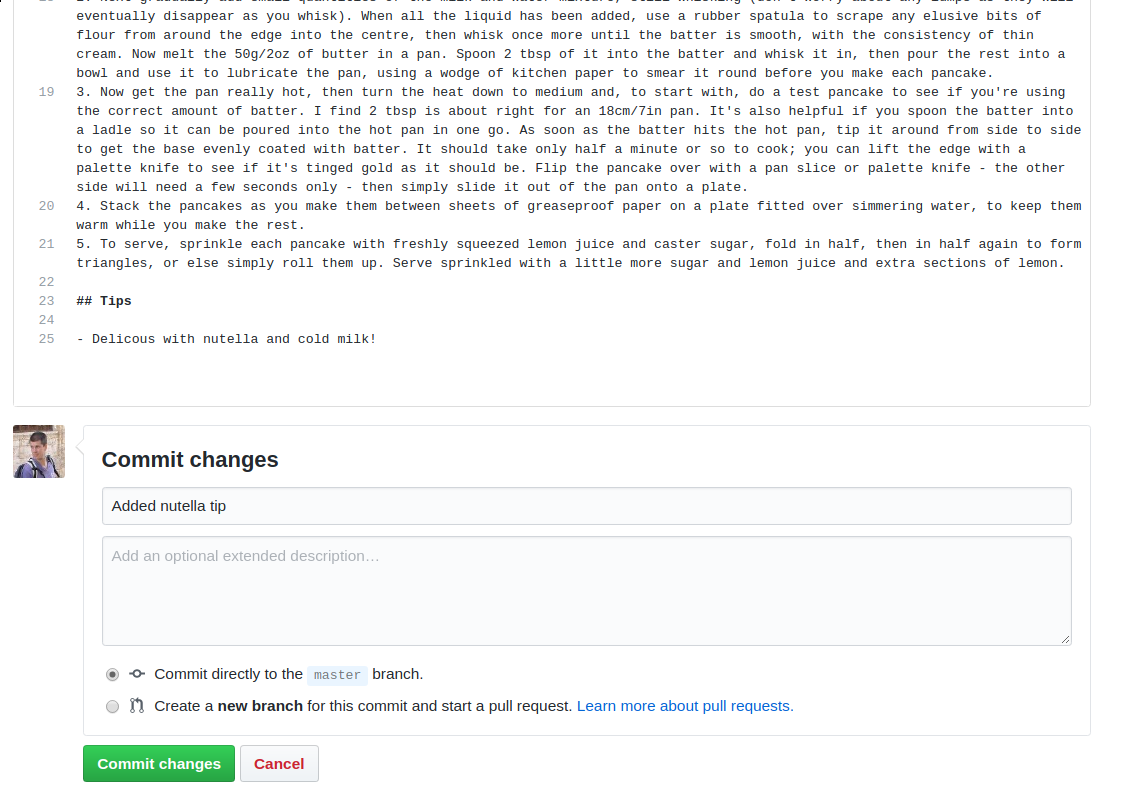
LaurentGatto adds a Tips section and a new bullet point suggesting
to enjoy the pancakes with chocolate spread and cold milk. The file
update needs a message (and an optional extended description, that is
left black here) before the actual commit.
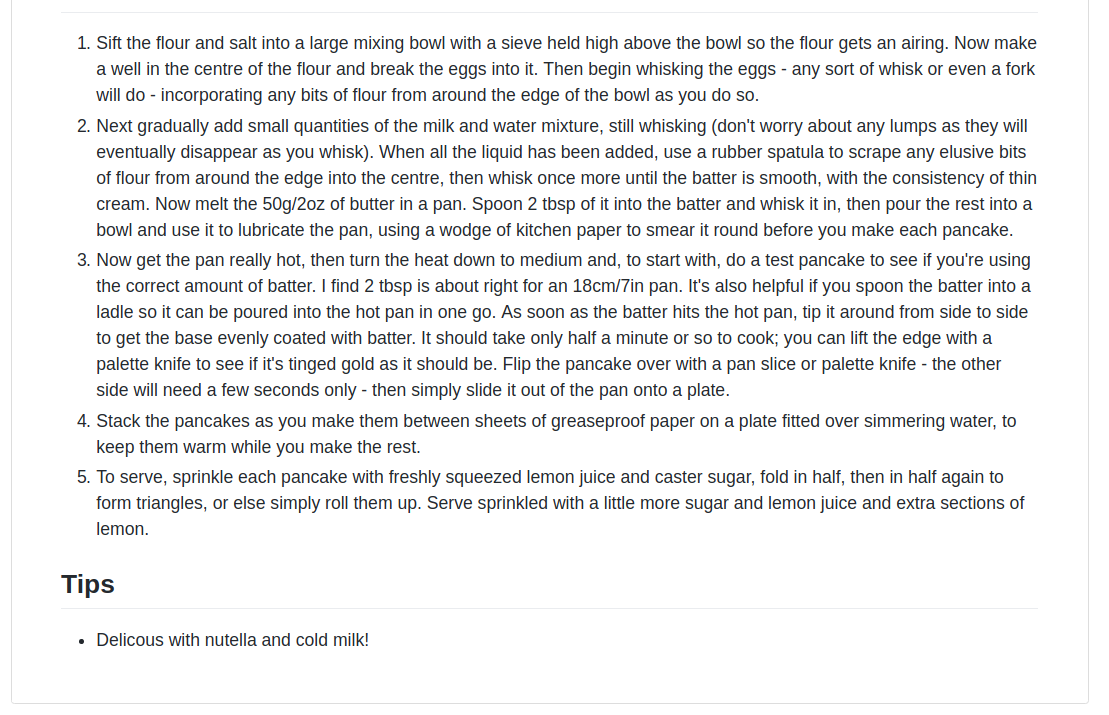
Below, we see the updated pancakes.md file with LaurentGatto’s
repository.
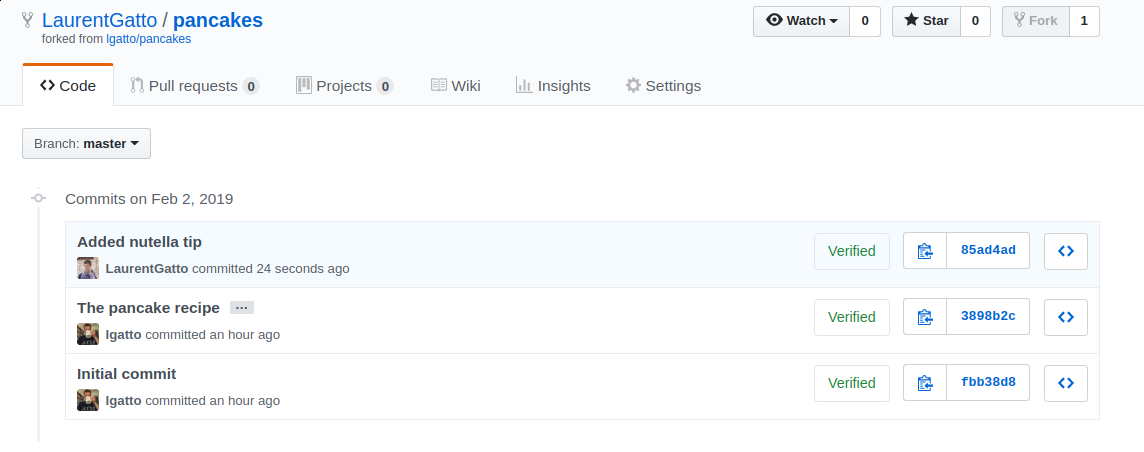
Checking the commit history of the repository, we see that there’s now
a third commit Added nutella tip, by LaurentGatto, in addition to
the previous ones by lgatto. Note in the title above that these
changes have been recorded in LaurentGatto/pancakes, a fork of
lgatto/pancakes, and do not exist in lgatto/pancakes at this time.
User LaurentGatto, is he wishes so, can now contribute his changes
back to the original repository by sending a Pull request from the
identically named tab.

There’s currently no existing pull request (often shorted as PR) under
the Pull requests tab, and a new one can be started by clicking the
green New pull request button.

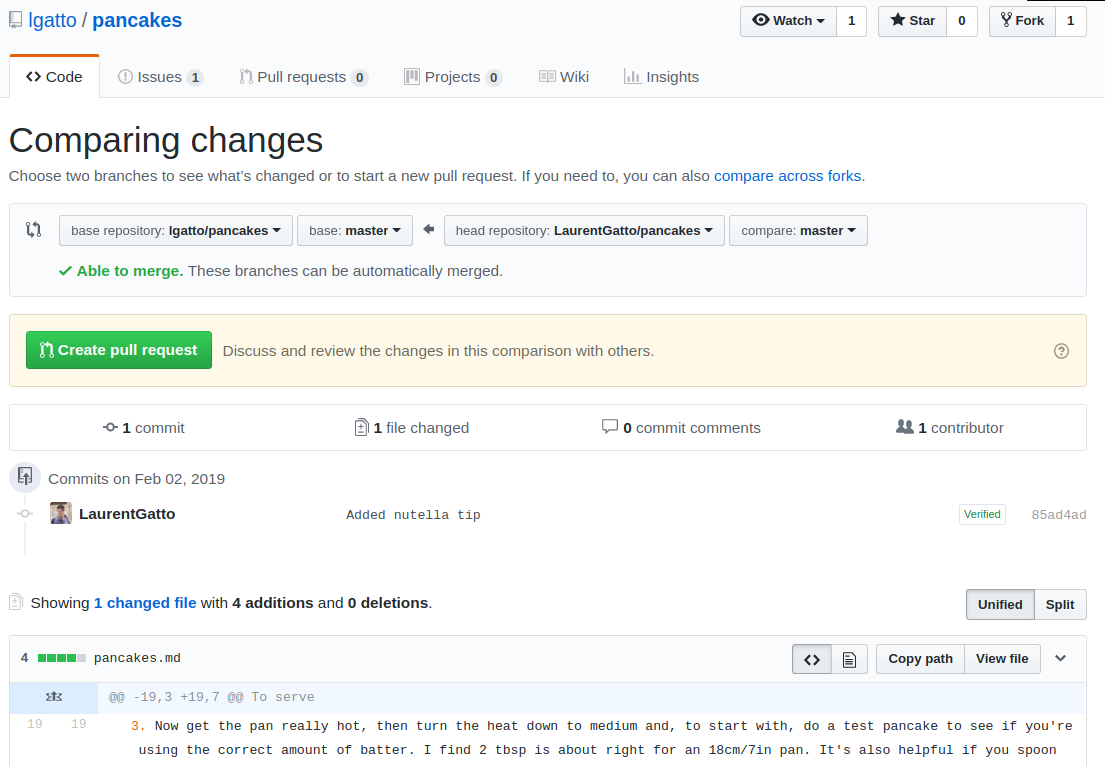
LaurentGatto can now see the differences between the original and
the forked repositories (i.e. a single commit by user LaurentGatto -
the actual difference between the file(s) could be seen scrolling
down) and can initiate the pull request by clicking the green Create
pull request button.
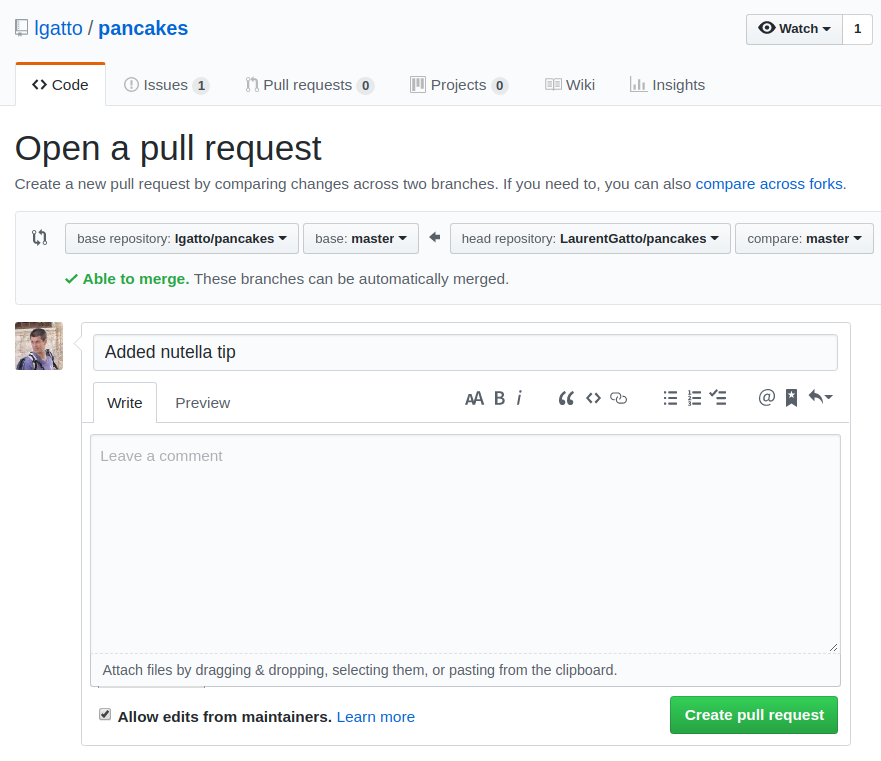
It can be useful to provide addition comments, or a general
description for a PR, before actually sending it back to the original
repository. Once the Create pull request button is pressed and the
PR is sent, the page udpates to the destination repository,
i.e. lgatto/pancakes in this example.
Back in the initial lgatto/pancakes repository, we see that there’s
no conflict between the current state of lgatto/pancakes and the PR
from LaurentGatto. There could be a conflict if multiple changes
affected the same line.
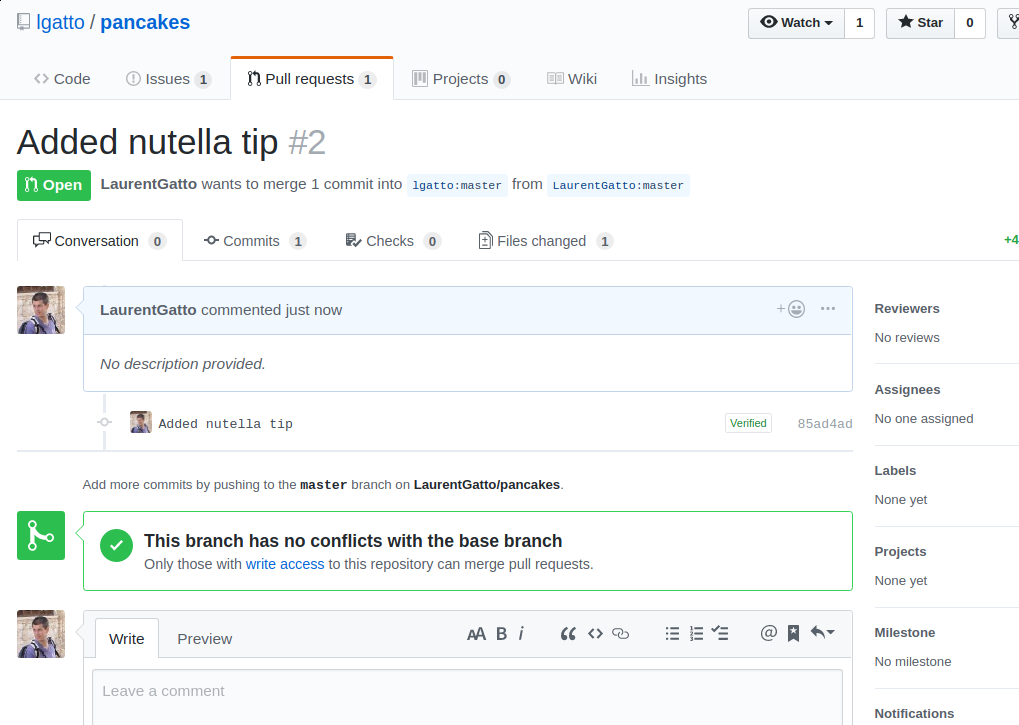
The next screen-shot shows the lgatto/pancake repository as seen by
lgatto, where the PR from LaurentGatto has now appeared and can be
merged.
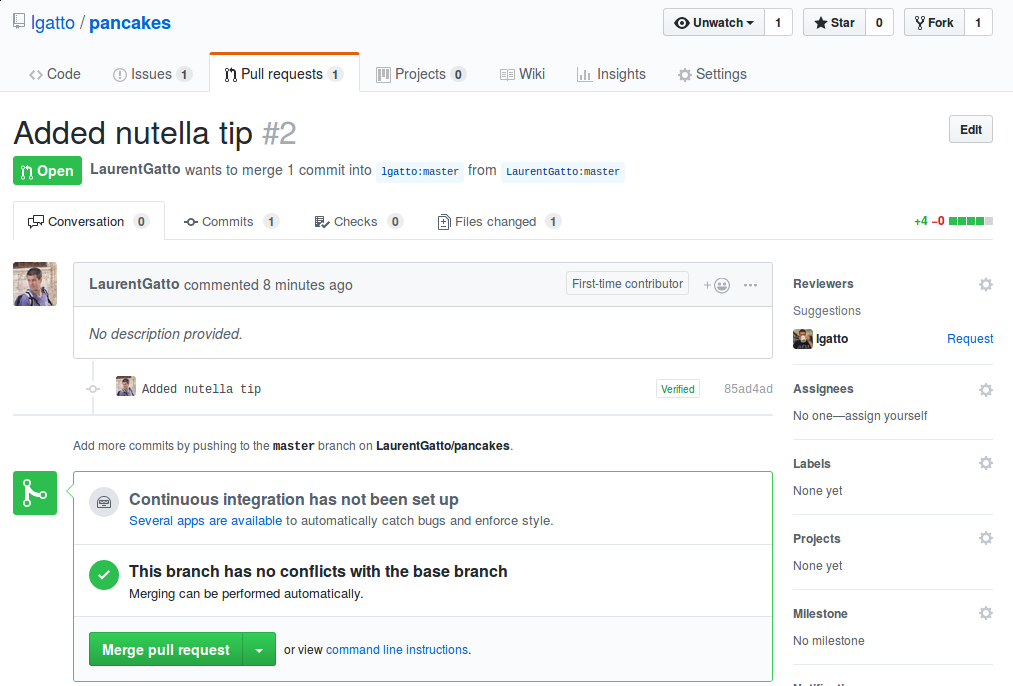
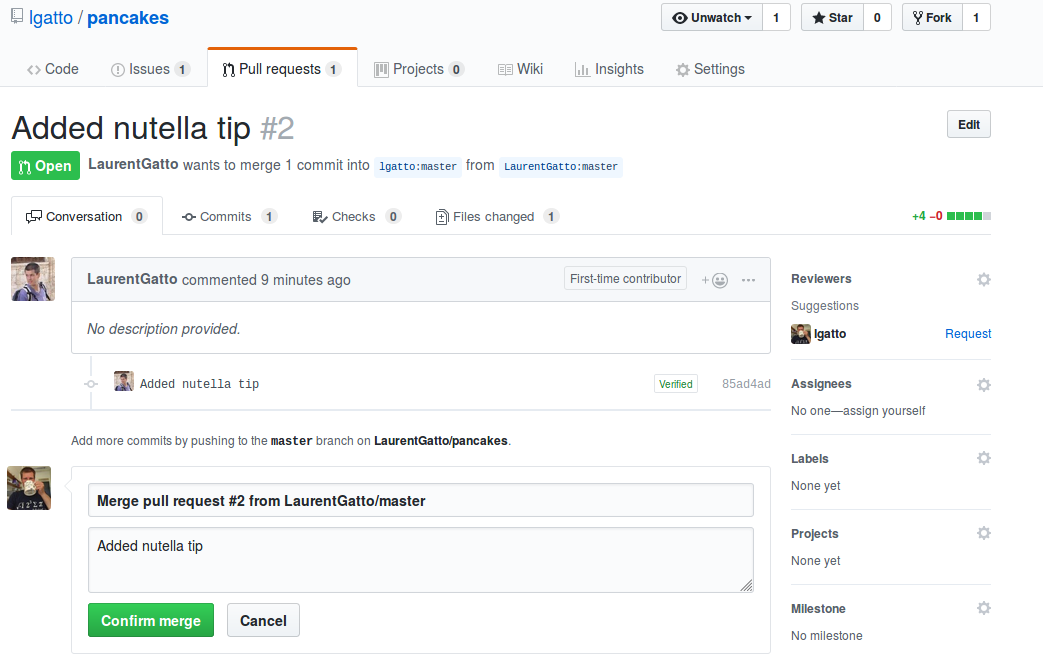
Below, the merge is confirmed with a small message. This mechanism however also allows to explicitly review pull requests and ask for specific changes before accepting to merge.
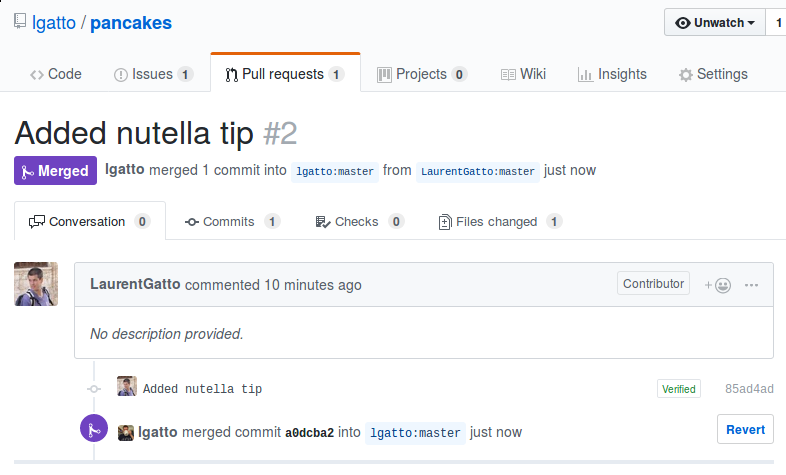
The following screen-shot show the merged PR.
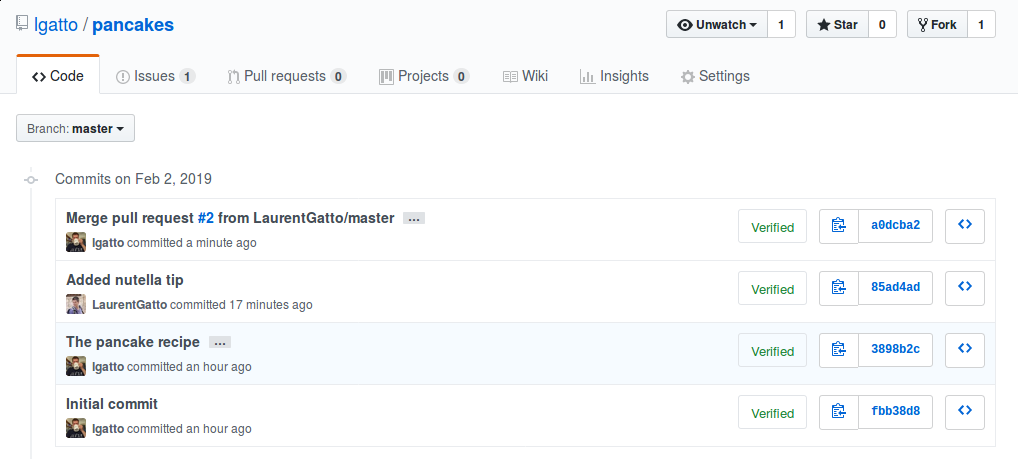
Here we look at the commit history of lgatto/pancake, and we can see
that LaurentGatto did a modification and that lgatto merged it
into lgatto/pancakes.
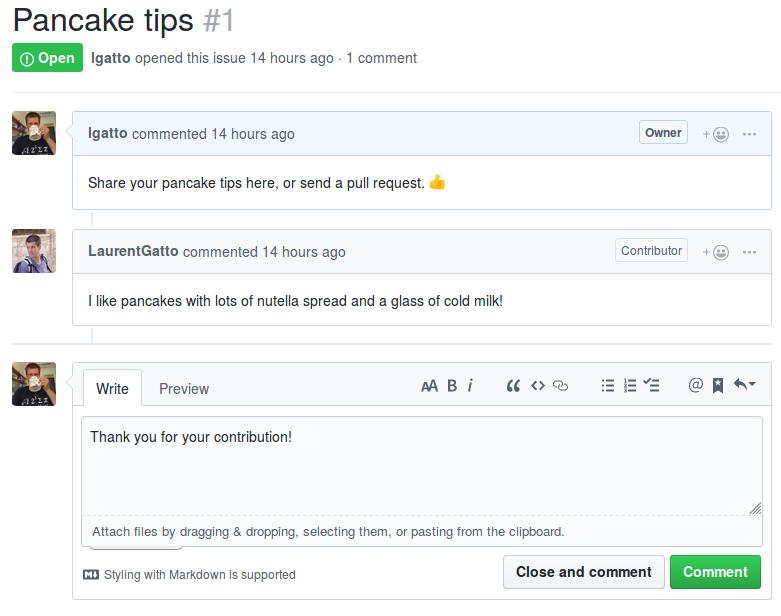
Below, we show the previously opened Pancake tips issue (issue #1),
how lgatto posts a last comment and closes the issue with the Close
and comment green button.
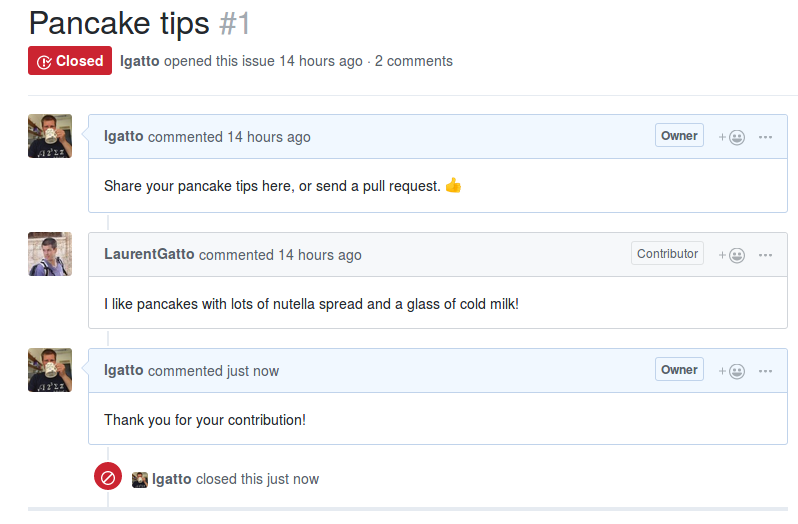
Closed issues aren’t deleted and still visible on the repository.

Navigating commits
If we look back at the commit history, we see towards the unique
commit tags and, on their right, buttons that allow to browse a past
state of the repository. Below, the commit corresponding to the
addition of the pancake recipe is selected (commit message
3898b2c2cab04761b64b78dbe3725e84b585ca2c).
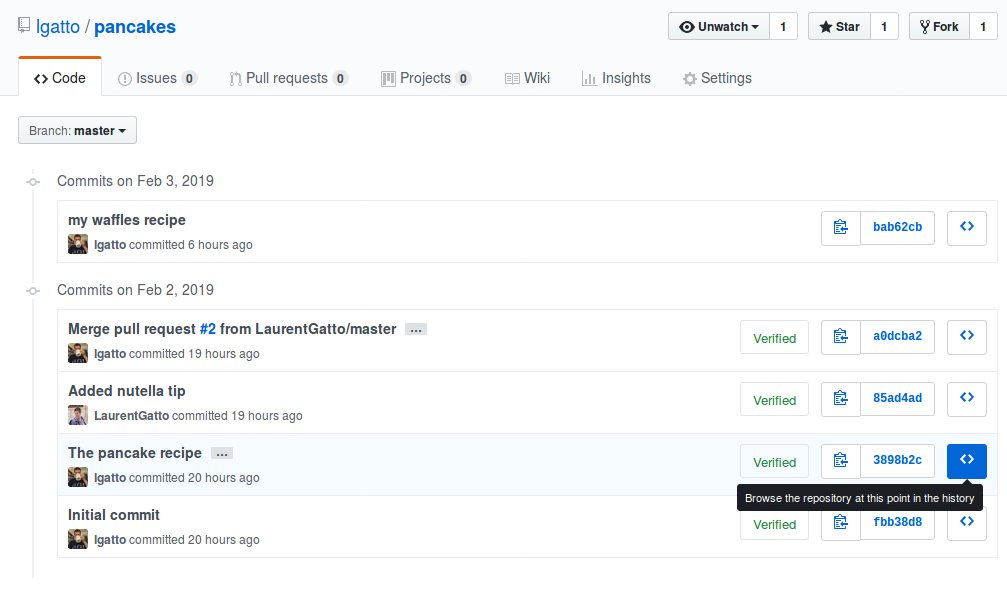
We are now in the exact state of that commit.

Cloning locally
So far, we have exclusively used GitHub. But for more substantial
projects, where source code or analysis reports are written and
executed, repositories are managed and updated locally. The creation
of a new (local) copy is called cloning, and can be done using the
URL under the Clone or download button2.

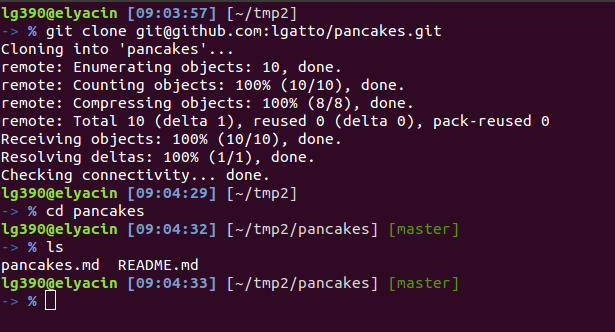
From the command line3, the command4
git clone git@github.com:lgatto/pancakes.git
will produce a full copy (i.e. all files with complete history) in a local directory. In this case, we see that we have the two files.
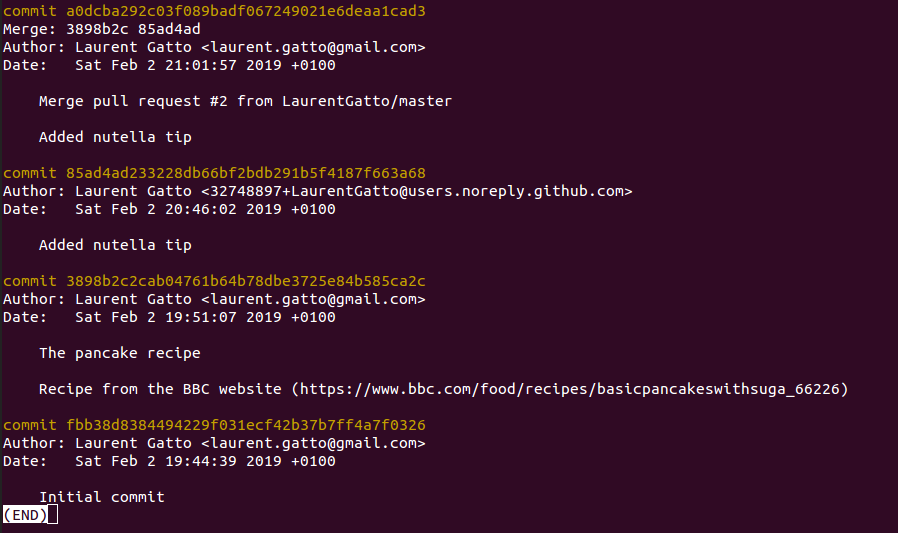
The git log command recapitulates the full commit history.
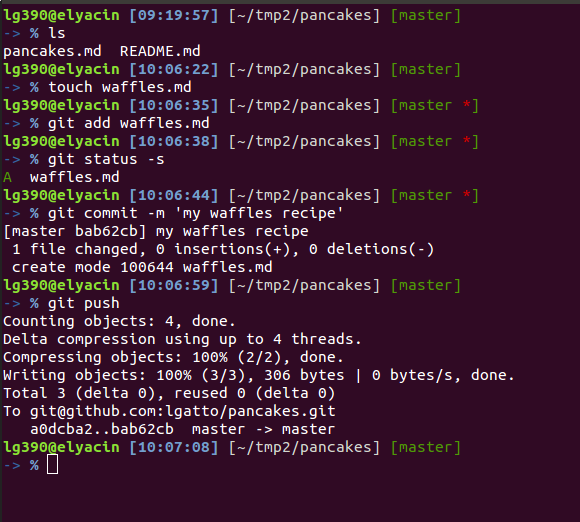
It is of course also possible to add new files from a local
repository. Below, we create a new (empty) file with touch
waffles.md to store a recipe for waffles. We then in turn add the
file to the local repository, commit the addition (with a little
commit message), and actually push it to the remote repository. The
screen-shot below also illustrates the status command to show the
current status of the repository - here, one new added (A) file.
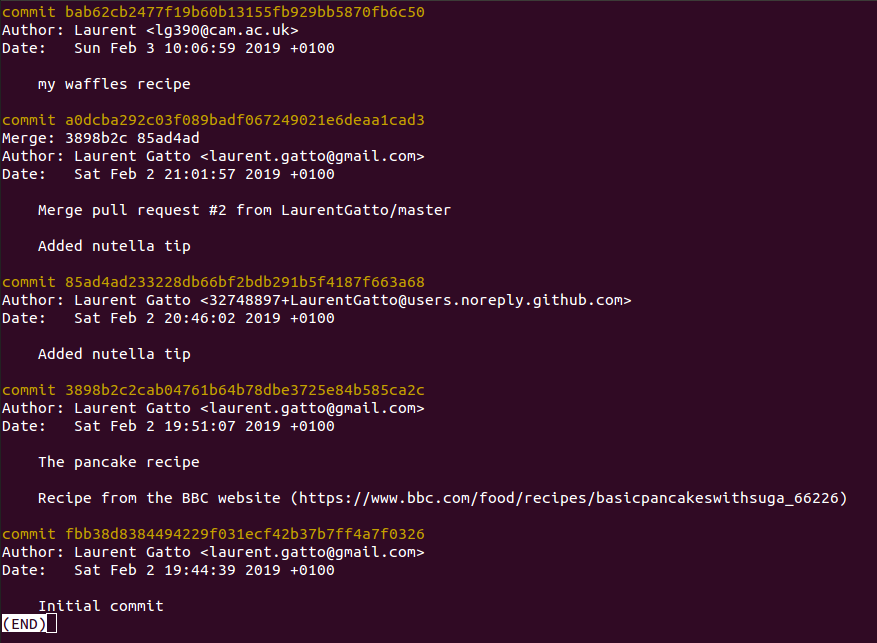
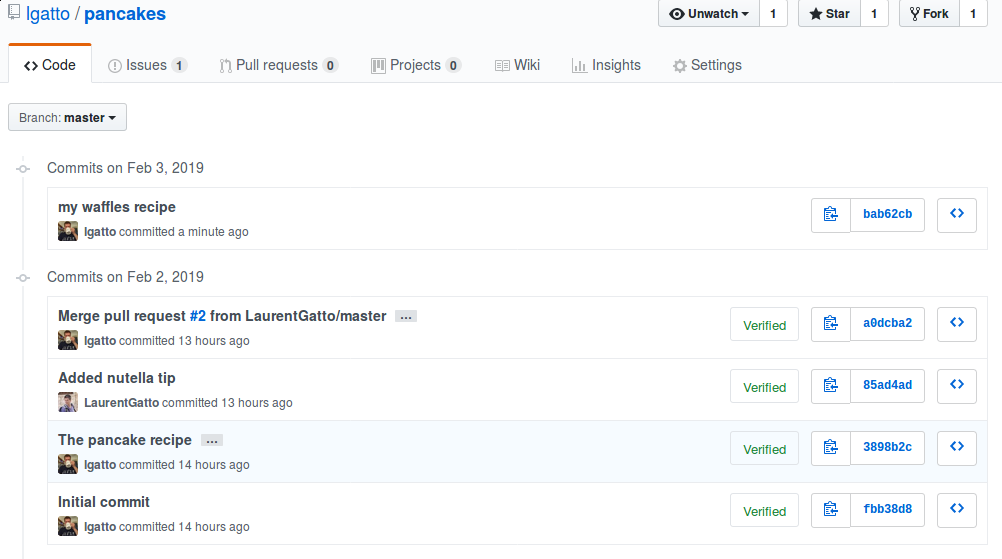
Below, we see the update repository git log output, with the latest
commit.
When pushing a commit from a local repository, the files and the history are updated in the remote repository.
Conclusions
What do I use Github for? Many things, including
-
software development (here’s the
MSnbaseR/Bioconductor package repository, that has been going on since Oct 4 2010, according to the git log) -
project management (here’s a current
MSnbasedevelopment project) and issue tracking and discussions (the latestMSnbaseissue is #425) -
collaborative writing papers (here’s the repository of the Ten Simple Rules for Taking Advantage of git and GitHub paper, that was written and managed collaboratively using GitHub)
-
course development (here’s the repository for my Introduction to bioinformatics course (WSBIM1207) course)
-
…
In particular, when analysing data for collaborators, we always create a GitHub repository in which all the code goes. Issues are used to discuss specific points, and very often, I ask my collaborators to create a Github account to join in, and ask project-related questions directly on Github rather than in scattered emails. This allows to track all discussion about a project in the same place.
Finally, while it isn’t a replacement for a proper backup solution (the size of file on GitHub is limited), it can be used as such. In addition, even for a single user, it allows to easily work on different computers while keeping track of changes, irrespective of where they were done.
Further reading and references
-
Perez-Riverol Y, Gatto L, Wang R, Sachsenberg T, Uszkoreit J, Leprevost Fda V, Fufezan C, Ternent T, Eglen SJ, Katz DS, Pollard TJ, Konovalov A, Flight RM, Blin K, Vizcaino JA. Ten Simple Rules for Taking Advantage of Git and GitHub. PLoS Comput Biol. 2016 Jul 14;12(7):e1004947. doi:10.1371/journal.pcbi.1004947 PMID:27415786.
-
README files are among the three most important files in a repository, and typically provide a short description of the project, how to cite it, a quick start guide or tutorial, information on how to contribute, a TODO list, and links to additional documentation, … ↩
-
It is also possible to download a repository, it the goal is only to get download the files and not keep working with git to commit new changes. ↩
-
There also exists graphical user interfaces to manage local repositories. ↩
-
Using
git@github.comrequires to have write access to the repository. If that’s not the case, thehttpsprotocol should be used. ↩

